How to Root Your Nexus 7 Tablet Running Android 4.4 KitKat (Windows Guide)
Sure, without root there's lots you can use it for. It's helped me get out of bed, became my own personal bartender, and a lot more.
But with a rooted Nexus 7, you can install and use special features like KitKat's immersive mode, add extra swipe gestures, set separate home and lock screen wallpapers, and other cool Xposed Framework mods to personalize and automate your life.
Rooting may sound like a tricky procedure, but it's really not. Thanks to an awesome root-kit made specifically for all Nexus devices (including both the 2012 and 2013 Nexus 7), the process for rooting is virtually painless.
Update: There's a new root method available, and it's the easiest one yet. No need for USB cables, computers, drivers, or toolkits. Simply download an app, run it, and you're root 30 seconds later. Check out our guide here, it's worked flawlessly with 2013 Nexus 7's, but currently doesn't work for 2012 editions as well. Worst comes to worst, you can always come back to this guide, as that process does not erase any data.
Before you begin, make sure you're on the latest version of Android, KitKat (version 4.4.X)—head to Settings -> About tablet -> System updates -> and hit Check now. If you're still on Jelly Bean, you may want to check out our previous rooting 4.3 guide for Windows, though the process is almost the same.
Step 1: Enable USB Debugging
You need to allow the toolkit to make a connection to your Nexus, so you'll need to enable USB Debugging. Simply go into Settings -> Developer Options -> USB Debugging.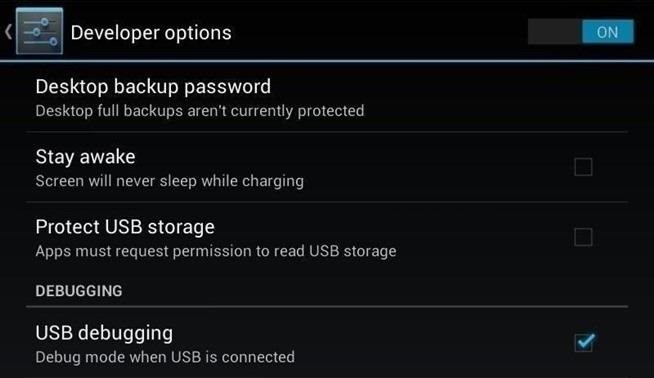
Step 2: Download & Install the WugFresh Nexus Toolkit
If you don't know, this kit is a Godsend—it literally does all of the heavy lifting for us. Head over to the WugFresh website and grab the latest version of the Nexus Root ToolKit, which has been updated with KitKat 4.4.2. compatibility.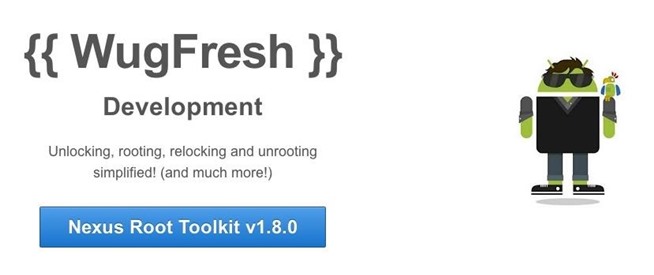
Step 3: Back Up Your Nexus
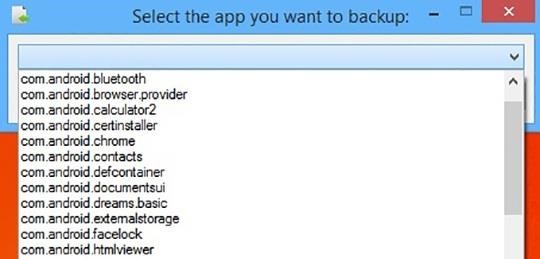
The first step to rooting is unlocking the bootloader, which I'll get into a little later. Unfortunately, that process means that you'll need to wipe the data on your device. If you're not interested in starting fresh, the WugFresh toolkit has you covered.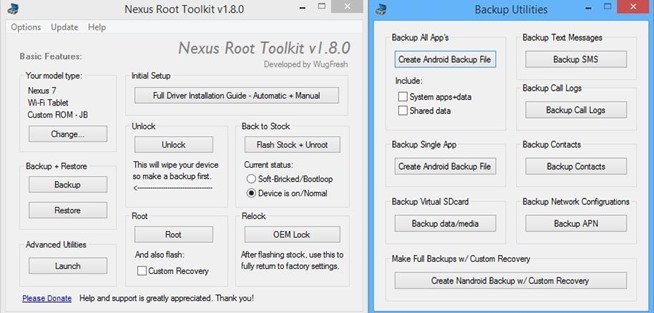
Unfortunately, app data is not restored automatically, so if you've got a great high score in Flappy Birds that you'd be sad to lose, you may want to back up your apps using the toolkit. Just select "Create Android Backup File," either under "Backup All Apps" or "Backup Single App."
Step 4: Set Up the Toolkit
When you initially launch the toolkit, you'll need to provide some basic information. Choose the specific Nexus device and build you have. If you're not sure what you input here, just select Auto Detect Device + Build.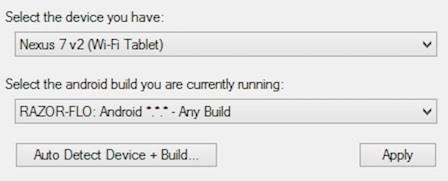
Step 5: Root Your Nexus 7
Finally, you're ready to root. Check the Custom Recovery option to also apply TWRP custom recovery to your device, then click Root to initiate the process.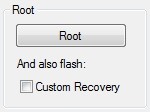
Step 6: Make Sure You're Rooted
An easy way to make sure the WugFresh toolkit worked and your Nexus 7 is rooted is to download the free Root Checker app from Google Play. Just open the app, select Verify Root, and wait for the results.
Unleashing WugFresh's Full Potential
Now that you've set up WugFresh with your device and are unlocked and rooted, let's quickly check out what else you can do with the toolkit.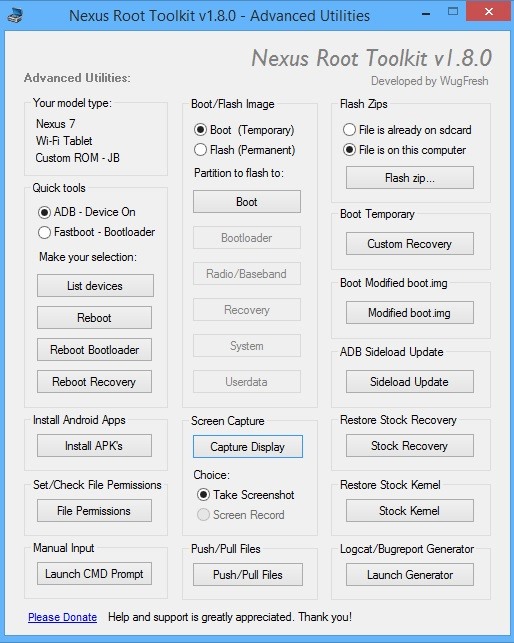
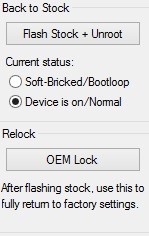
On the toolkit's main screen, you can also return your device to its original condition, removing root and re-locking the device.
Hacks Mod's & Root's
No comments:
Post a Comment